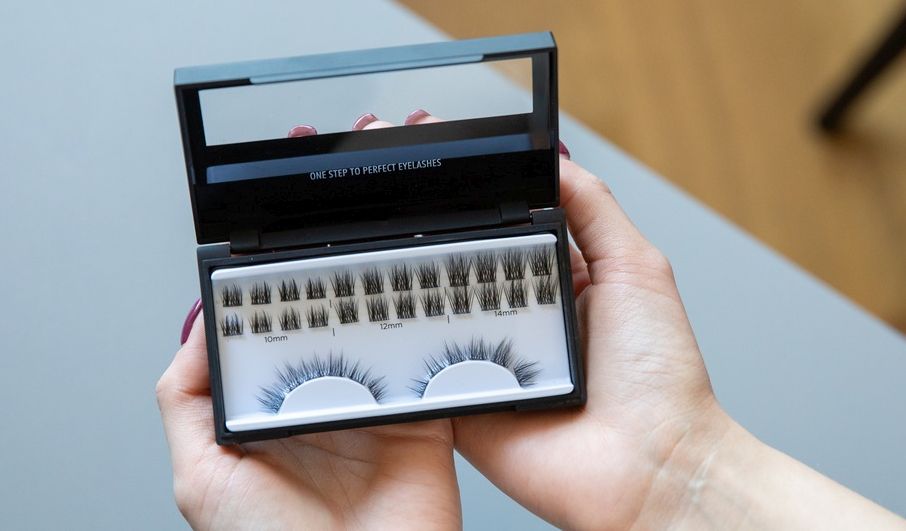
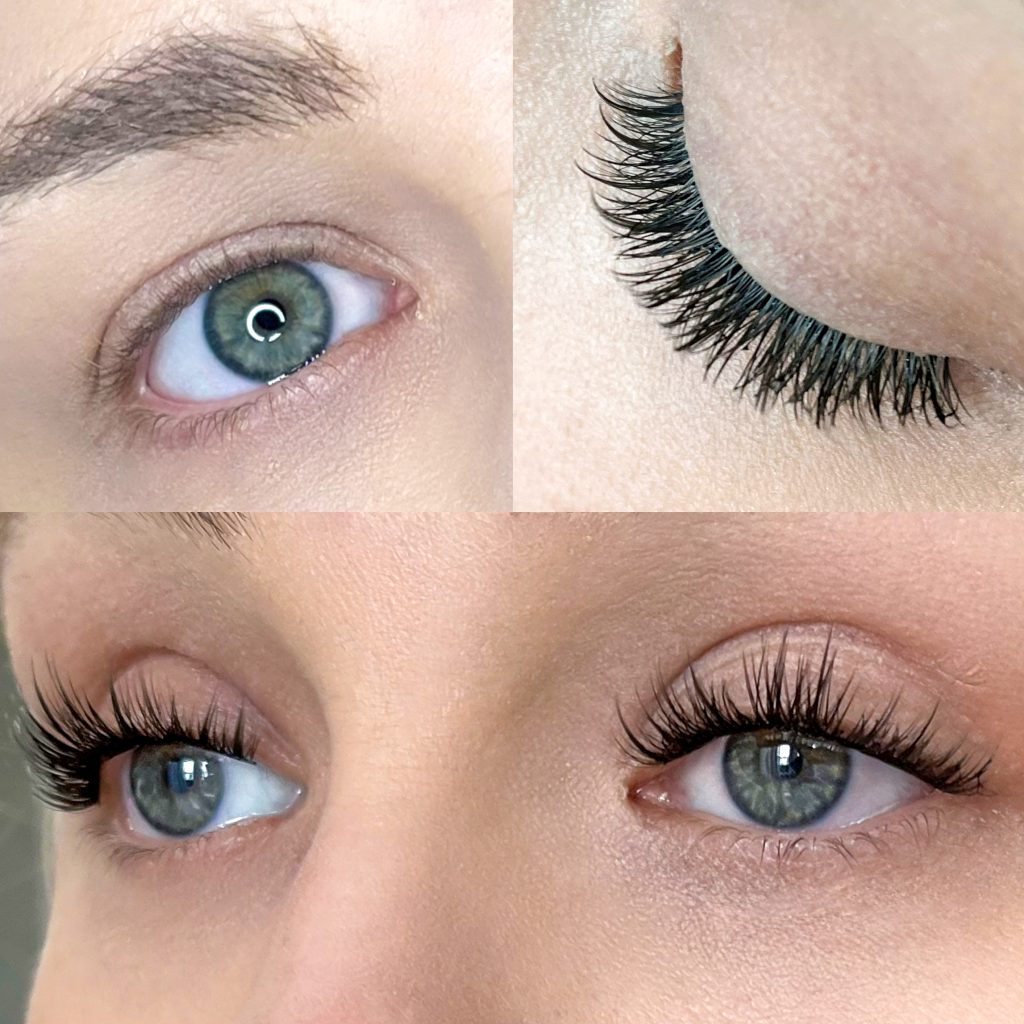
Healthy, thick and long – this is my idea of perfect lashes. Unfortunately, my natural lashes aren’t like that. They’re rather thin and barely there, and that’s why I decided to test the cluster lashes – Nanolash DIY Lash Extensions!
At the brand’s official online store I found a case including 36 DIY cluster lashes; they come in 8 styles and each case contains 3 lash sizes: 10 mm, 12 mm, 14 mm (the variety is the greatest benefit for me). The cluster lashes from the DIY Lash Extensions box can be mixed and matched to create the dream eyelash style.
DIY Lash Extensions – how did I apply the lash clusters?
I used to think that applying DIY cluster lash extensions was tricky. I thought even the best cluster lashes should be applied by a technician. Then, I came across the brand Nanolash and changed my mind.
- Nanolash DIY Lash Extensions are DIY cluster lashes. I bought the full lash extensions kit from the brand including the bonder, sealer, tweezers and remover. I wanted to make sure applying cluster lashes would go smoothly.
I applied the lash clusters following the instructions from the manufacturer who promises the process doesn’t take longer than 10 minutes. I set my timer!

Applying cluster lashes Nanolash DIY Lash Extensions was simple as promised, and took only three steps:
- After removing makeup with an oil-free remover, I applied a coat of the bonder all over the lashes – I waited for 30 seconds so that it got sticky enough.
- Using the tweezers I grabbed a cluster and attached it under my lashes, that is about one millimeter away from the water line.
- And finally I applied the sealer to clear the lashes of the sticky layer.
A glance at the timer: nearly 9 minutes. That’s exactly how long it took me to apply cluster lashes on both eyelids. The producer doesn’t lie!
DIY cluster lash extensions from Nanolash – How I felt wearing them and how long I wore them
I applied the cluster lashes following the directions for use. Now it’s time I told you about how long I wore them. First let me tell you what it was like to wear the DIY Lash Extensions. The things that I loved the most:
- These false cluster lashes are soft and lightweight – they didn’t cause irritations though I have sensitive eyes.
- The thin, flexible strip blends seamlessly with the natural lash line.
- The lash wisps are so light I couldn’t feel any weight when wearing them.

Summing up, these are the best cluster lashes for everyday use as well as special occasions! The Divine model adds depth to the look.
How long do the DIY Lash Extensions last?
The manufacturer promises we can wear the DIY Lash Extensions for up to 5 days. I’m always determined to check whether cosmetics brands deliver on a promise and so was I with these wisps. After application, I did my best to treat the clusters gently. I didn’t use oil-based products that would break down the glue.
My lash clusters stayed untouched for eight days! Instead of the indicated five days I managed to make the lash wisps last longer thanks to proper aftercare.
Nanolash DIY Lash Extensions – disposable cluster lashes? Not really!
On the Nanolash website I read that Nanolash DIY Lash Extensions are disposable. I think we can reuse them worry-free. After taking off cluster lashes, I noticed:
- They preserved their shape.
- The clusters didn’t lose any lashes.
- The remover was great for removing the lash glue.
All in all, we can reuse the Nanolash DIY Lash Extensions without worrying about their shape!
DIY cluster lash extensions from Nanolash – review summing-up
I think the Nanolash DIY Lash Extensions are the best cluster lashes that give endless possibilities as far as lash styles go. Various styles and lengths let me match the clusters to achieve the desired look. Plus, when it comes to application, these are the most comfortable to wear and use clusters I’ve tried so far.
I also love how long the lash clusters last and the possibility of putting them on again. One box contains 36 clusters which was enough for 4 uses! I could get natural-looking, fabulous, voluminous lashes in just 10 minutes.


